Flutter Internationalization With Crowdin: Part 2
March 29th, 2021 · 5 minute read
This guide is a continuation of Flutter Internationalization With Crowdin: Part 1. If you have not read part one yet, it can be found here.
Prerequisites
- Flutter app uploaded to GitHub repository
- Internationalization set up in Flutter app
- Localization folder to store localization files
What is Crowdin?
Crowdin is basically a localization management tool that helps you translate your project. You can use easily invite a team of translators that can help translate your app or you can use Crowdin's in house translations.

How Crowdin Works
Crowdin will first allow you to upload your source file manually or using an integration. The source file will have the strings for the main language of your app and will already be fully translated by you. For many people the source file will be in English, it all depends on what the default language of your app is. Once you give Crowdin that source file, Crowdin will create the language files respective to the target languages (the languages you choose when creating your project). These files can then be filled with translated strings using Crowdin's translation dashboard. Once your language files are translated, Crowdin can automatically update your localization files through the integration you set up. Pretty neat huh?
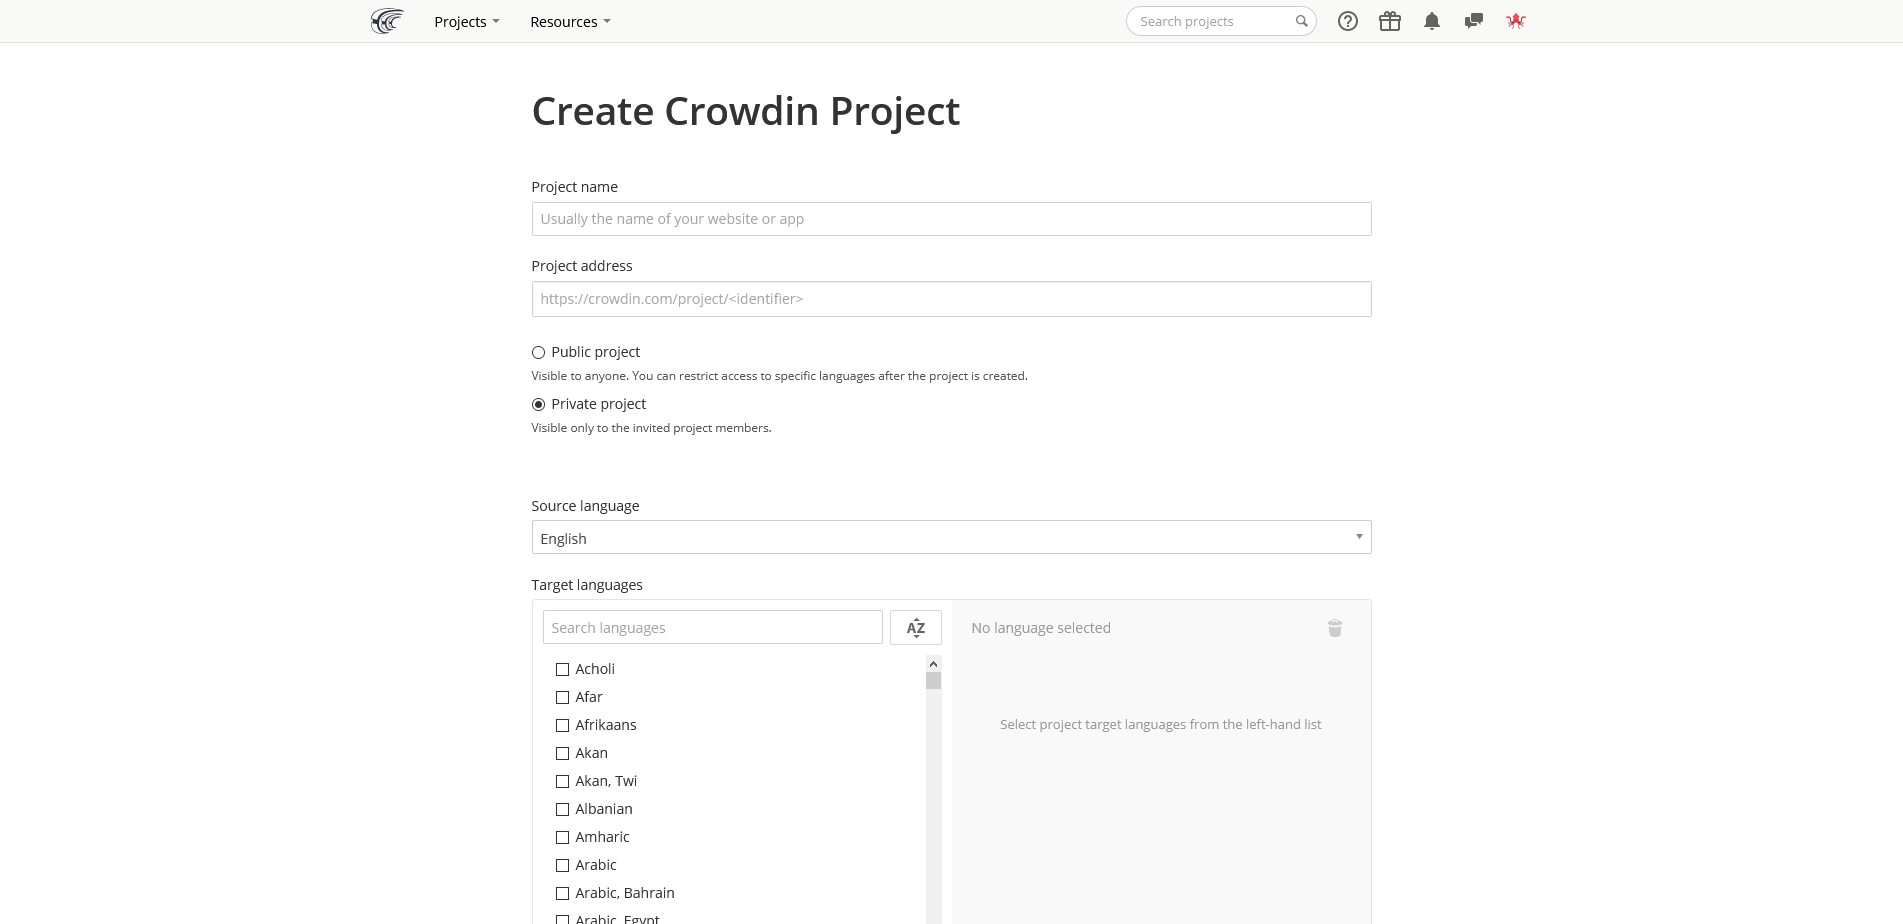
Setting up Crowdin
You can get started with Crowdin by creating an account here. Once you have done that you can then create your own project by clicking on Projects > Create Project. Enter in the details for your project then press on Create Project.
Integrating Crowdin with Github
Once you have created your Crowdin project, navigate to the Integrations tab.
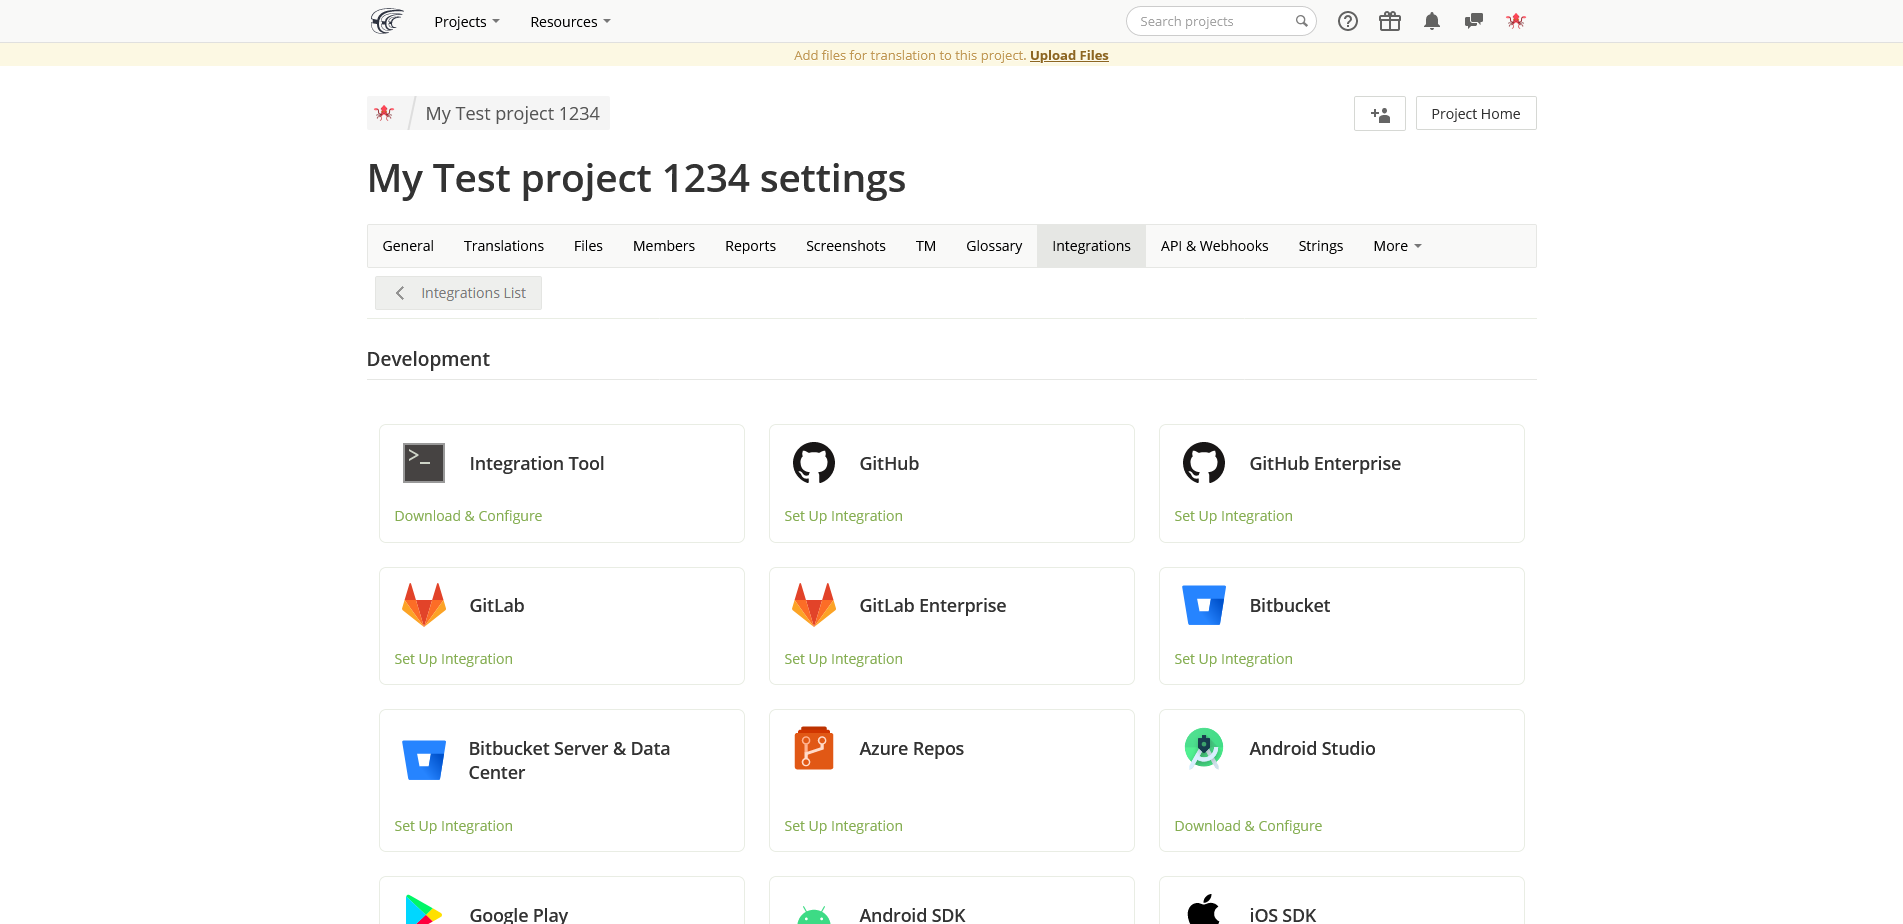
Now click on the integration you'd like to use. For this guide I will be using GitHub but feel free to use whatever suits you best (guide will differ if you use something other than GitHub).

Click on the set up integration and Authorize crowdin with your GitHub account. You should then be redirected back to Crowdin and this pop-up should appear.
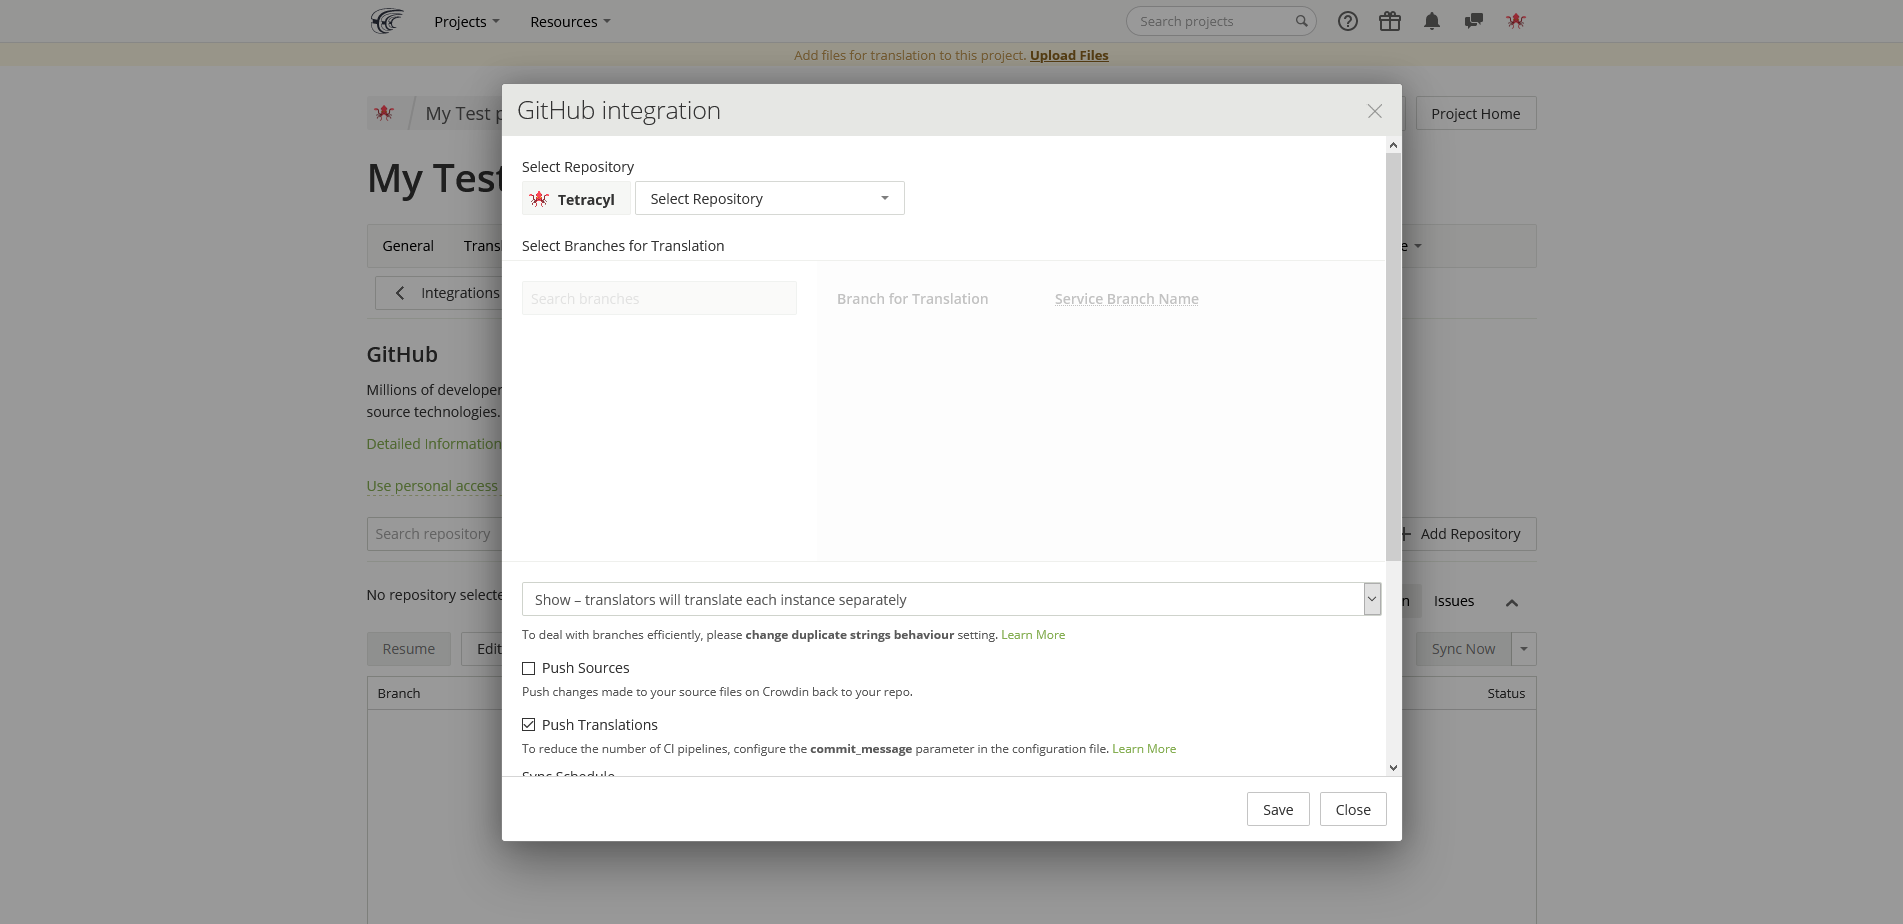
Now click on Select Repository, select your flutter app's repository, select the branch for the translation (will most likely be master or main), and set the service branch name to i18n. If you would like Crowdin to automatically push translated files from Crowdin to your GitHub repo, click the Push Sources check box. If you would like Crowdin to automatically push the language files from your GitHub repo, click the Push Translations check box. The sync schedule is the interval for when Crowdin will push sources or translations to or from the GitHub. Once you've configured the integration, you can press on Save.
When you click save, a new branch should appear. Double click on the branch and another pop up should appear. Click on Continue.
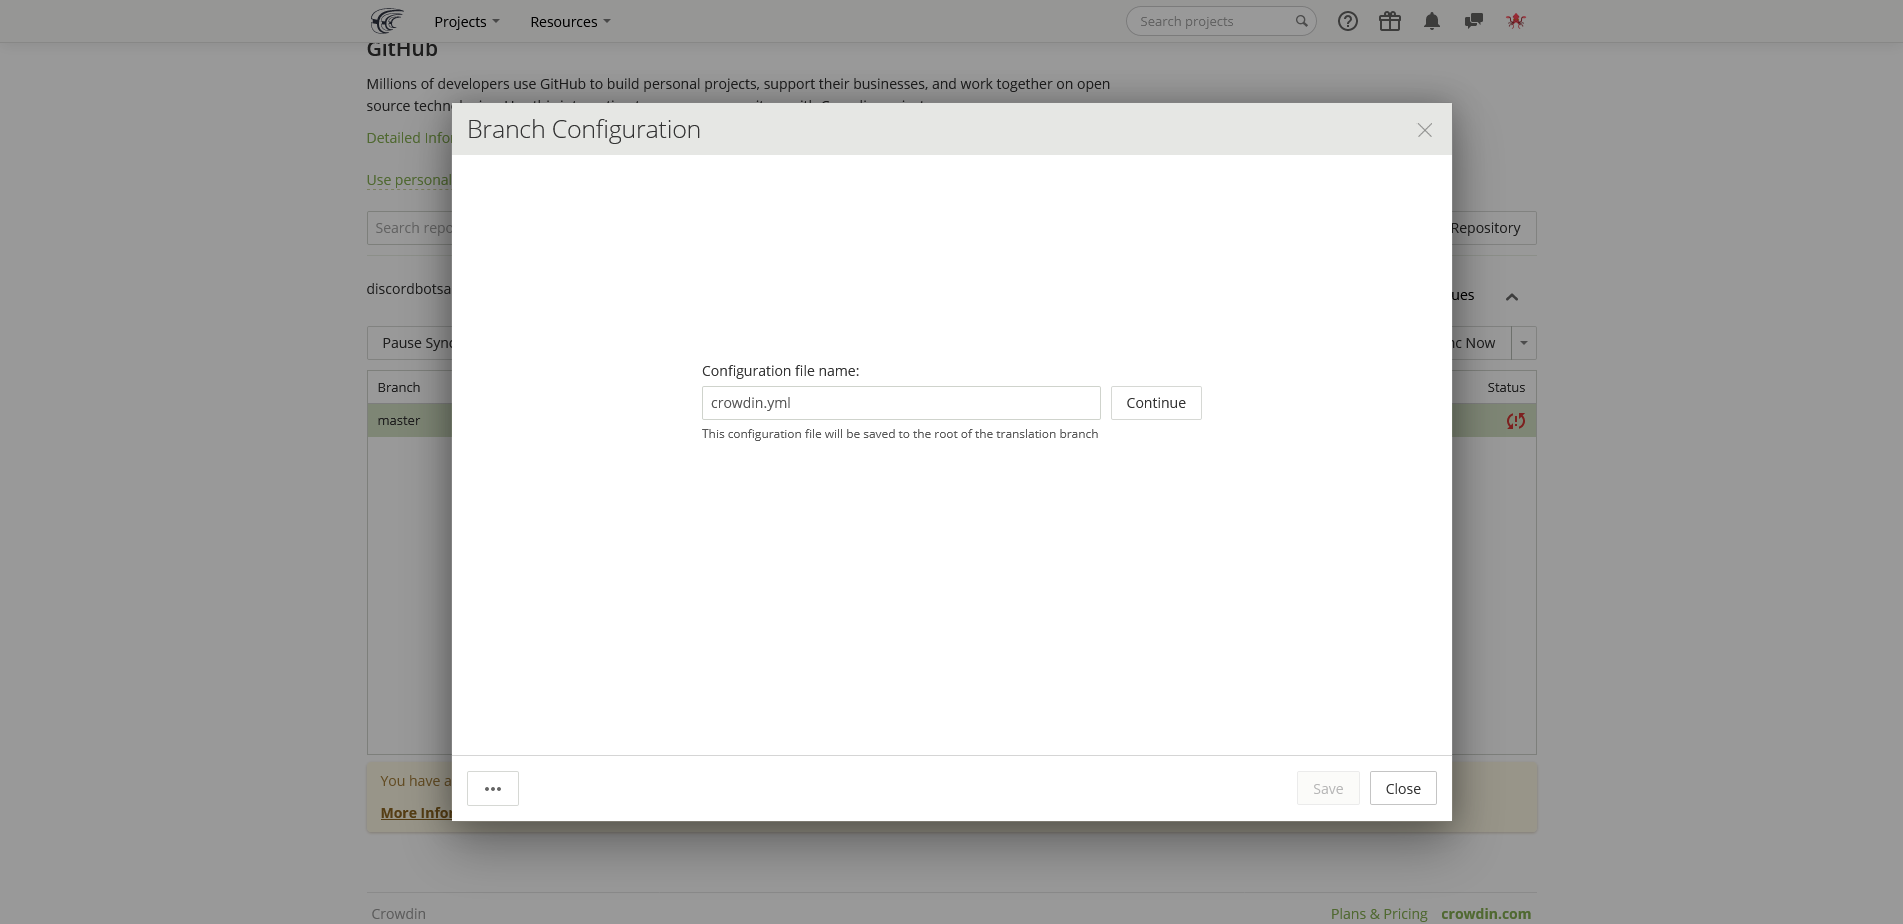
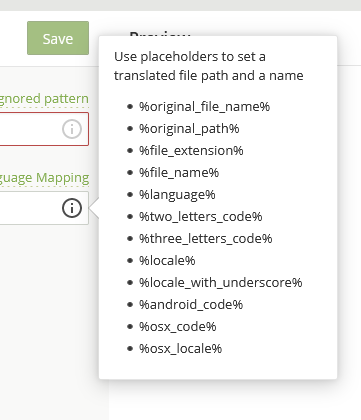
Here you can tell Crowdin where to retrieve the source filed and where to push the translated files. If your source file is located in the i18n folder and called en-US.json for example, your source file path would be /i18n/en-US.json. If you'd like your translated files to be in the i18n folder you created in the last guide, your translated file path would be /i18n/%locale%.json. The %locale% is a place holder and will be replaced with the actual locale of the file. A list of all the placeholders are available by clicking on the info icon
Congratulations!
When you have configured your branch the way you'd like, click save and then press Sync Now. If the project manages to sync without any issues then congrats! If you are experiencing issues, try visiting the documentation or contacting support. Once you have the GitHub integration set up, I'd recommend exploring and playing around with the website a bit since it takes a bit of getting used to.